Skip to content

Word

Create Your OWN Personalized Newspaper Online – Video Tip

In this month’s group, we talked about and demonstrated how to set up a web page that can be personalized. I like to use a customized web page (portal) as my home page (first page that shows up when I start my browser). We looked at the Yahoo portal (My Yahoo) and the newer Google customized home page.

Both services require that you register and setup a user name and password. Once you register, you can customize your page to include weather information, stock portfolios, sports news and scores, news from industries or topics that you choose, comics, and even content from other web pages. Both services are free and give you the flexibility to add, subtract and edit any type of data that you choose.

  • After you sign in, first look for the

Microsoft Word’s AutoComplete and AutoCorrect Functions – Video Tip

If you use Microsoft Word, you may notice that at the end of a letter, if you start typing ‘Sin’, a little yellow box flashes up with ‘Sincerely’ in it. Likewise, if you start a letter with ‘To whom’, the box flashes at you with ‘To whom it may concern’.

These little yellow boxes are part of Word’s Auto-Complete and Auto Format functions. Microsoft Word tries to guess what you are going to type next and flashes suggestions to you. If the suggestion is correct and you press Enter on your keyboard, Word quickly enters the word or phrase in your document.You also notice it when you mistype the as hte and Word corrects it for you.

Wrap text around pictures in Microsoft Word – Video Tip

If you use Microsoft Word to create any kind of document that includes pictures, wrapping text around a picture can be frustrating. Today's tip will give you some easy to follow steps that will have you wrapping text like a pro. A bonus of using this tip is that you can also move your pictures around your document to almost any position.

As is my cardinal rule of word processing, type all your text in first then add pictures after your text is finished. To insert a photo or other image into Word:

  1. Position the cursor where you want the picture to appear
  2. Click Insert –> Picture –> From File (note that you can also scan pictures directly in at this point also)
  3. Navigate to your photo
  4. Click

Creating Tables in Microsoft Word – Part II – Video Tip

In Part I of my "Creating Tables" tip, I discussed what a table was, how to create them, and some basics on how to customize them. In Part II of the tip, I discuss how to use reverse text, cell coloring, sorting, formulas and create a form all with tables. The video takes a few minutes to load (may be too slow for dial-up), but the wait is worth the knowledge.

Cut, Copy and Paste! – Video Tip

These techniques should be standard tools for any computer user. However, many computer users find these techniques elusive.

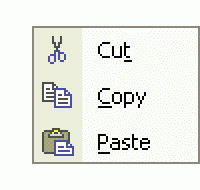
The ability to move (cut) or copy information from one computer program to another sets you free to do so much more with your computer. Cut, Copy and Paste function by temporarily storing the information, cut or copied, into a temporary holding spot of memory known as the clipboard (Click here for the Webopedia definition).

The information held in the clipboard stays there and is available to Paste until either the computer is restarted or another item is cut or copied. Make special note of this fact when using the "Cut" command, because if you cut or copy another item before pasting the first item, the first one is lost.

Before choosing Cut or Copy, the computer needs to know what you want to cut or copy. This is done by using the mouse to

Searching within a Web page – Video Tip

This tip falls in the category of “wow, that’s easy to do, I wish I would have known about it long ago!”

When you are on a particularly long web page and need to find a term or phrase, click on Edit from your menus, then Find (or Find in page on some browsers). The keyboard shortcut is Ctrl + F. You will be presented with a small window that allows you to enter a word or phrase and then the computer will look for that word on the page and bring you right to it.

As with many other features, Mozilla Firefox’s implementation of this feature is superior to all other browsers, as it gives you helpful extras like find the next or previous occurrence of the word or phrase you are looking for and even has an option to highlight all the occurrences on the page. (See the accompanying picture). 

Firefoxs Find in Page toolbar 

This tip is especially helpful for genealogy researchers. Sometimes your eyes can become crossed looking for a surname in a sea of text. Use the find function instead and cut your work and eye strain in half!

If you need to look for the same term again on the same page, you will notice that the function gives you the option to find again without retyping.

This type of search works best with single words, but you can experiment with phrases as well.

You can also use the Find function in Word Processing documents, email, spreadsheets, and PDF files as well.

Watch the short video below to see this tip in action in both Firefox and Internet Explorer.

Easily create labels with Microsoft Word

Printing labels can save you a lot of time and energy IF you approach the job correctly. Since Microsoft Word is still the leading word processor, I will discuss how to print labels with it. Today's tip will not discuss Mail Merge, as that is another can of worms for another day. For printing mail merge style labels, refer to this tip .

This tip will help you print a single label or a full sheet of labels with the same address or text.

Word Label dialog box
  1. Start Microsoft Word.
  2. Click Tools —> Envelopes and Labels from the menus (in the newest version of Word, you will find it in the Letters and Mailings section of the Tools menu).
  3. Click the Labels tab in the box that pops up.
  4. Type the address you want to print on the label (see #1 in the illustration).
  5. Click the Options button (see #2 in the illustration) to choose the type of label you are printing (try to purchase Avery labels or labels that have Avery compatible numbers on them).
  6. Click whether you want a full sheet of labels or just a single label (see #3 in the illustration).
    • If you are printing a single label, you can reuse a sheet of labels over and over by choosing the appropriate row and column that is next to print on your sheet.
  7. Before clicking Print, check to see if the address has spilled over onto the next line (in #1). If so, that indicates that the font size is too large for the chose label type. To correct this, highlight the entire address with your mouse, the RIGHT click it and choose font to make adjustments.
  8. Click New Document to see how the labels will look.
  9. Now print the labels on a regular sheet of paper and hold them up to a blank sheet of labels to make sure they will print appropriately. If it does, then load your labels in the printer tray (remember to load them the proper direction).

When finished printing, you can close and save the document if it is a sheet that you will use again in the future. Otherwise, just close and don't save the document.

Print Anything You See on Your Screen – Video Tip

Many times a computer user may need the ability to print what they see on the screen, but can’t access a Print command.  Using the underutilized Print Screen button on the keyboard can rectify this situation.

The Print Screen button is usually located just to the right of your F keys and above the Insert, Home, Delete key section.  

How to restore the missing toolbar or ribbon in Microsoft Office (Word, Excel) – Video Tip

Recently, I have been answering the question of how to restore a missing toolbar or ribbon from Microsoft Office tools like Word, Excel, or PowerPoint. This tip works for any of the Office tools 2007 or newer. Usually, the toolbar goes missing because of an errant click or keyboard combination. In the video below, I show how to restore the… Read More »How to restore the missing toolbar or ribbon in Microsoft Office (Word, Excel) – Video Tip